
01 Feb Create Calligraphy GIFS For Instagram In Procreate With These 10 Steps
It’s never been easier for calligrapher’s to create digital lettering for their business with the Procreate app and an iPad so today we’re chatting all about creating easy gifs to use in your calligraphy business or for clients! We’ll never stop trying to add handwritten touches wherever possible and gifs are no exception!
GIFs are such a fun way to add your own brand personality to your IG stories and snaps. We love making seasonal gifs and can’t wait to make city launch specific ones when we can launch Sip & Script in new cities again!
If you are a calligrapher and own an ipad with the Procreate app and have yet to make a GIF, today is the day! Going to walk you through creating a super basic yet fun type of calligraphy gif.
10 Steps to create a GIF for your business:
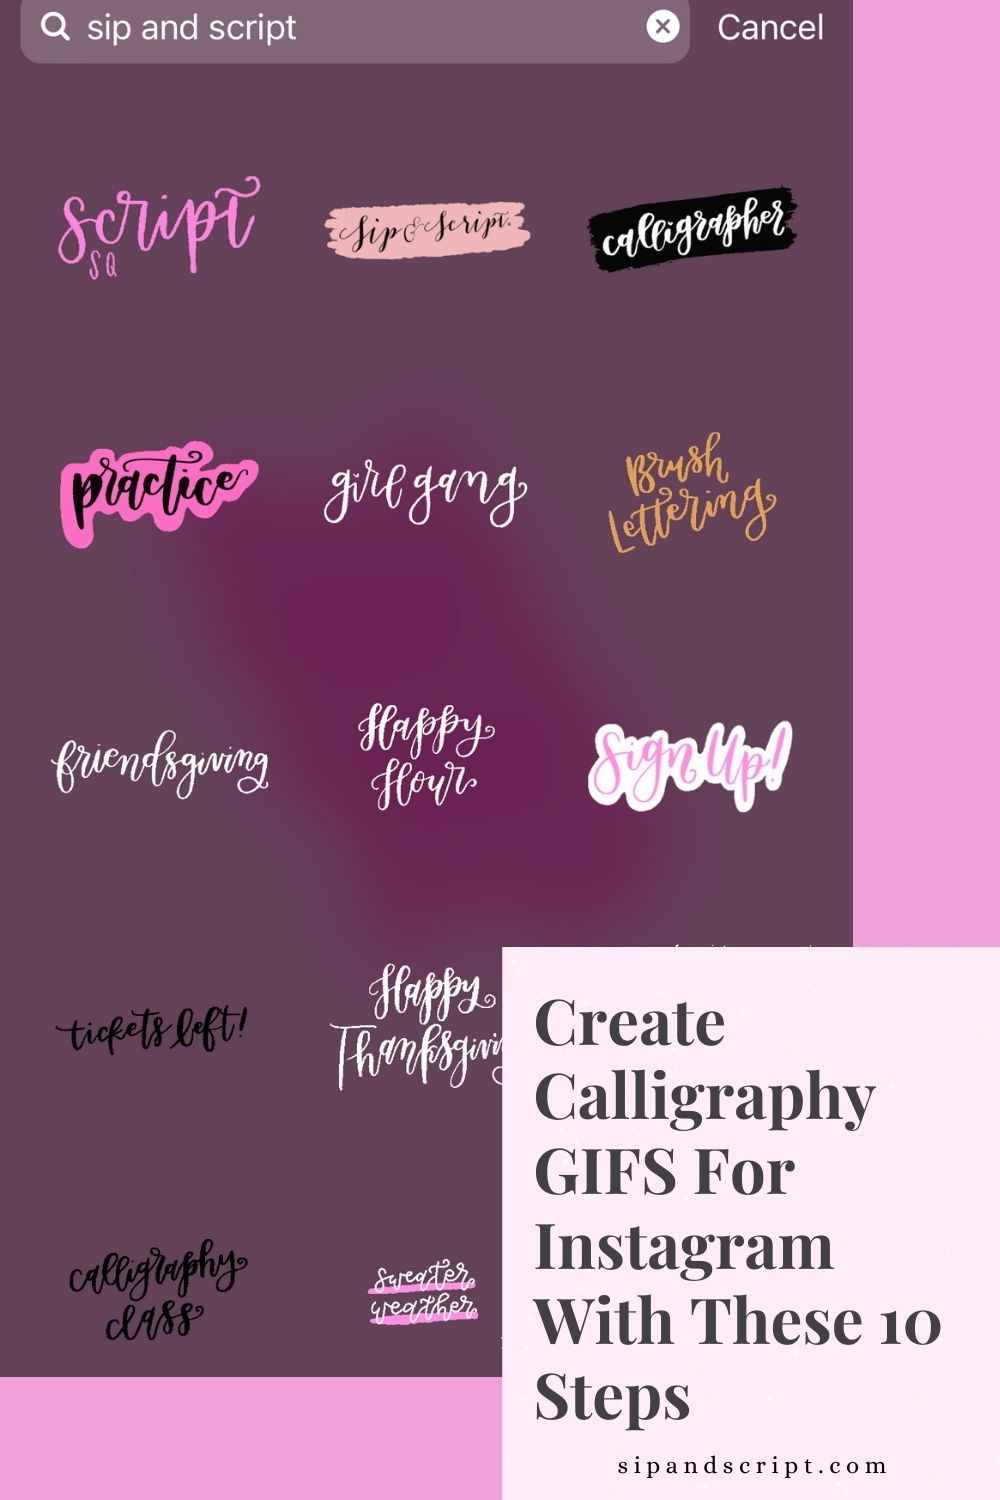
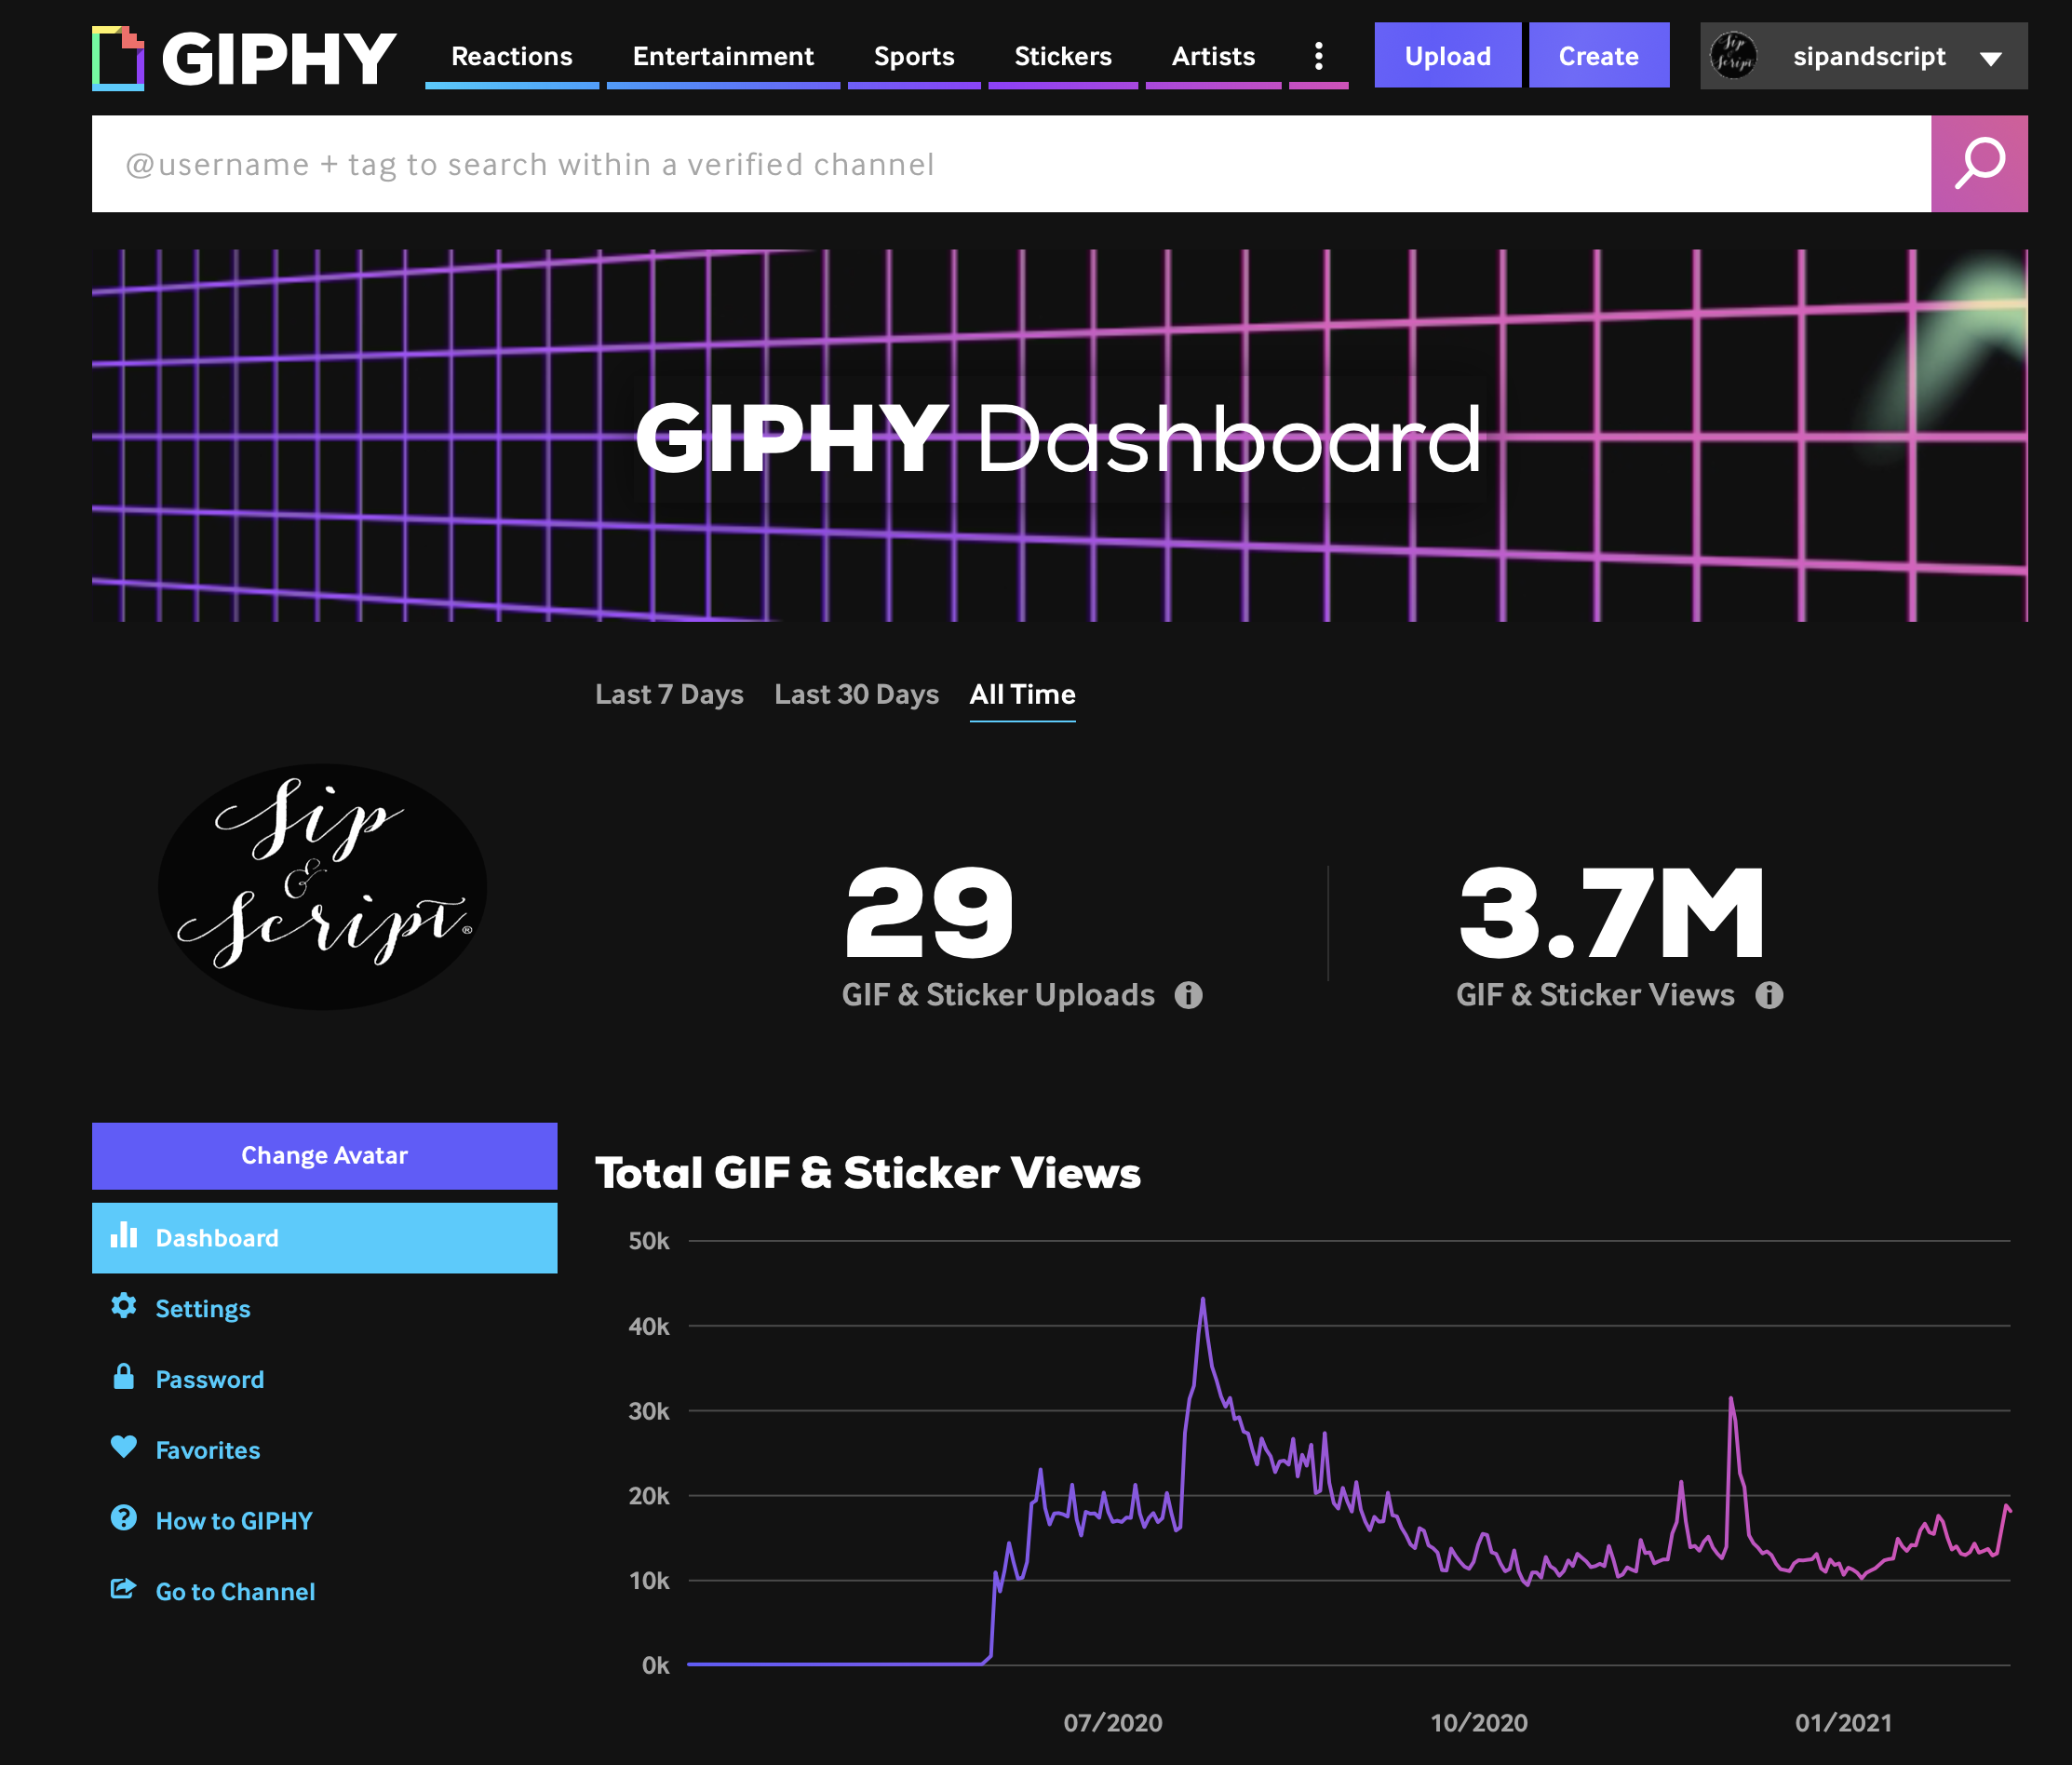
1.Apply for a brand or artist channel on GIPHY. This will take a little while to get approved (I believe ours took about a week, maybe a little longer) but you will need to submit at least 5 gifs with your application. To determine if you should apply as an artist or brand, read their FAQ page here. We applied as a brand with no issue! Once you’re approved you’ll be able to upload one gif at a time but you’ll need at least 5 gifs created to start!
2. Determine what you’ll want to write (or draw!) for GIFs. We did a few that we knew our students and instructors would like to use and then regularly add in seasonal phrases too. Today’s example is our new Galentine’s Day gif!
3. Open Procreate app and set up a blank canvas with a DPI of 600. You don’t have to worry about canvas size quite yet – we’ll get to that later on. Determine what color you want to write in and change the background color if you need to so you can see what you’re writing. Later you’ll upload the GIF as a transparent file so no need to get the background perfect.
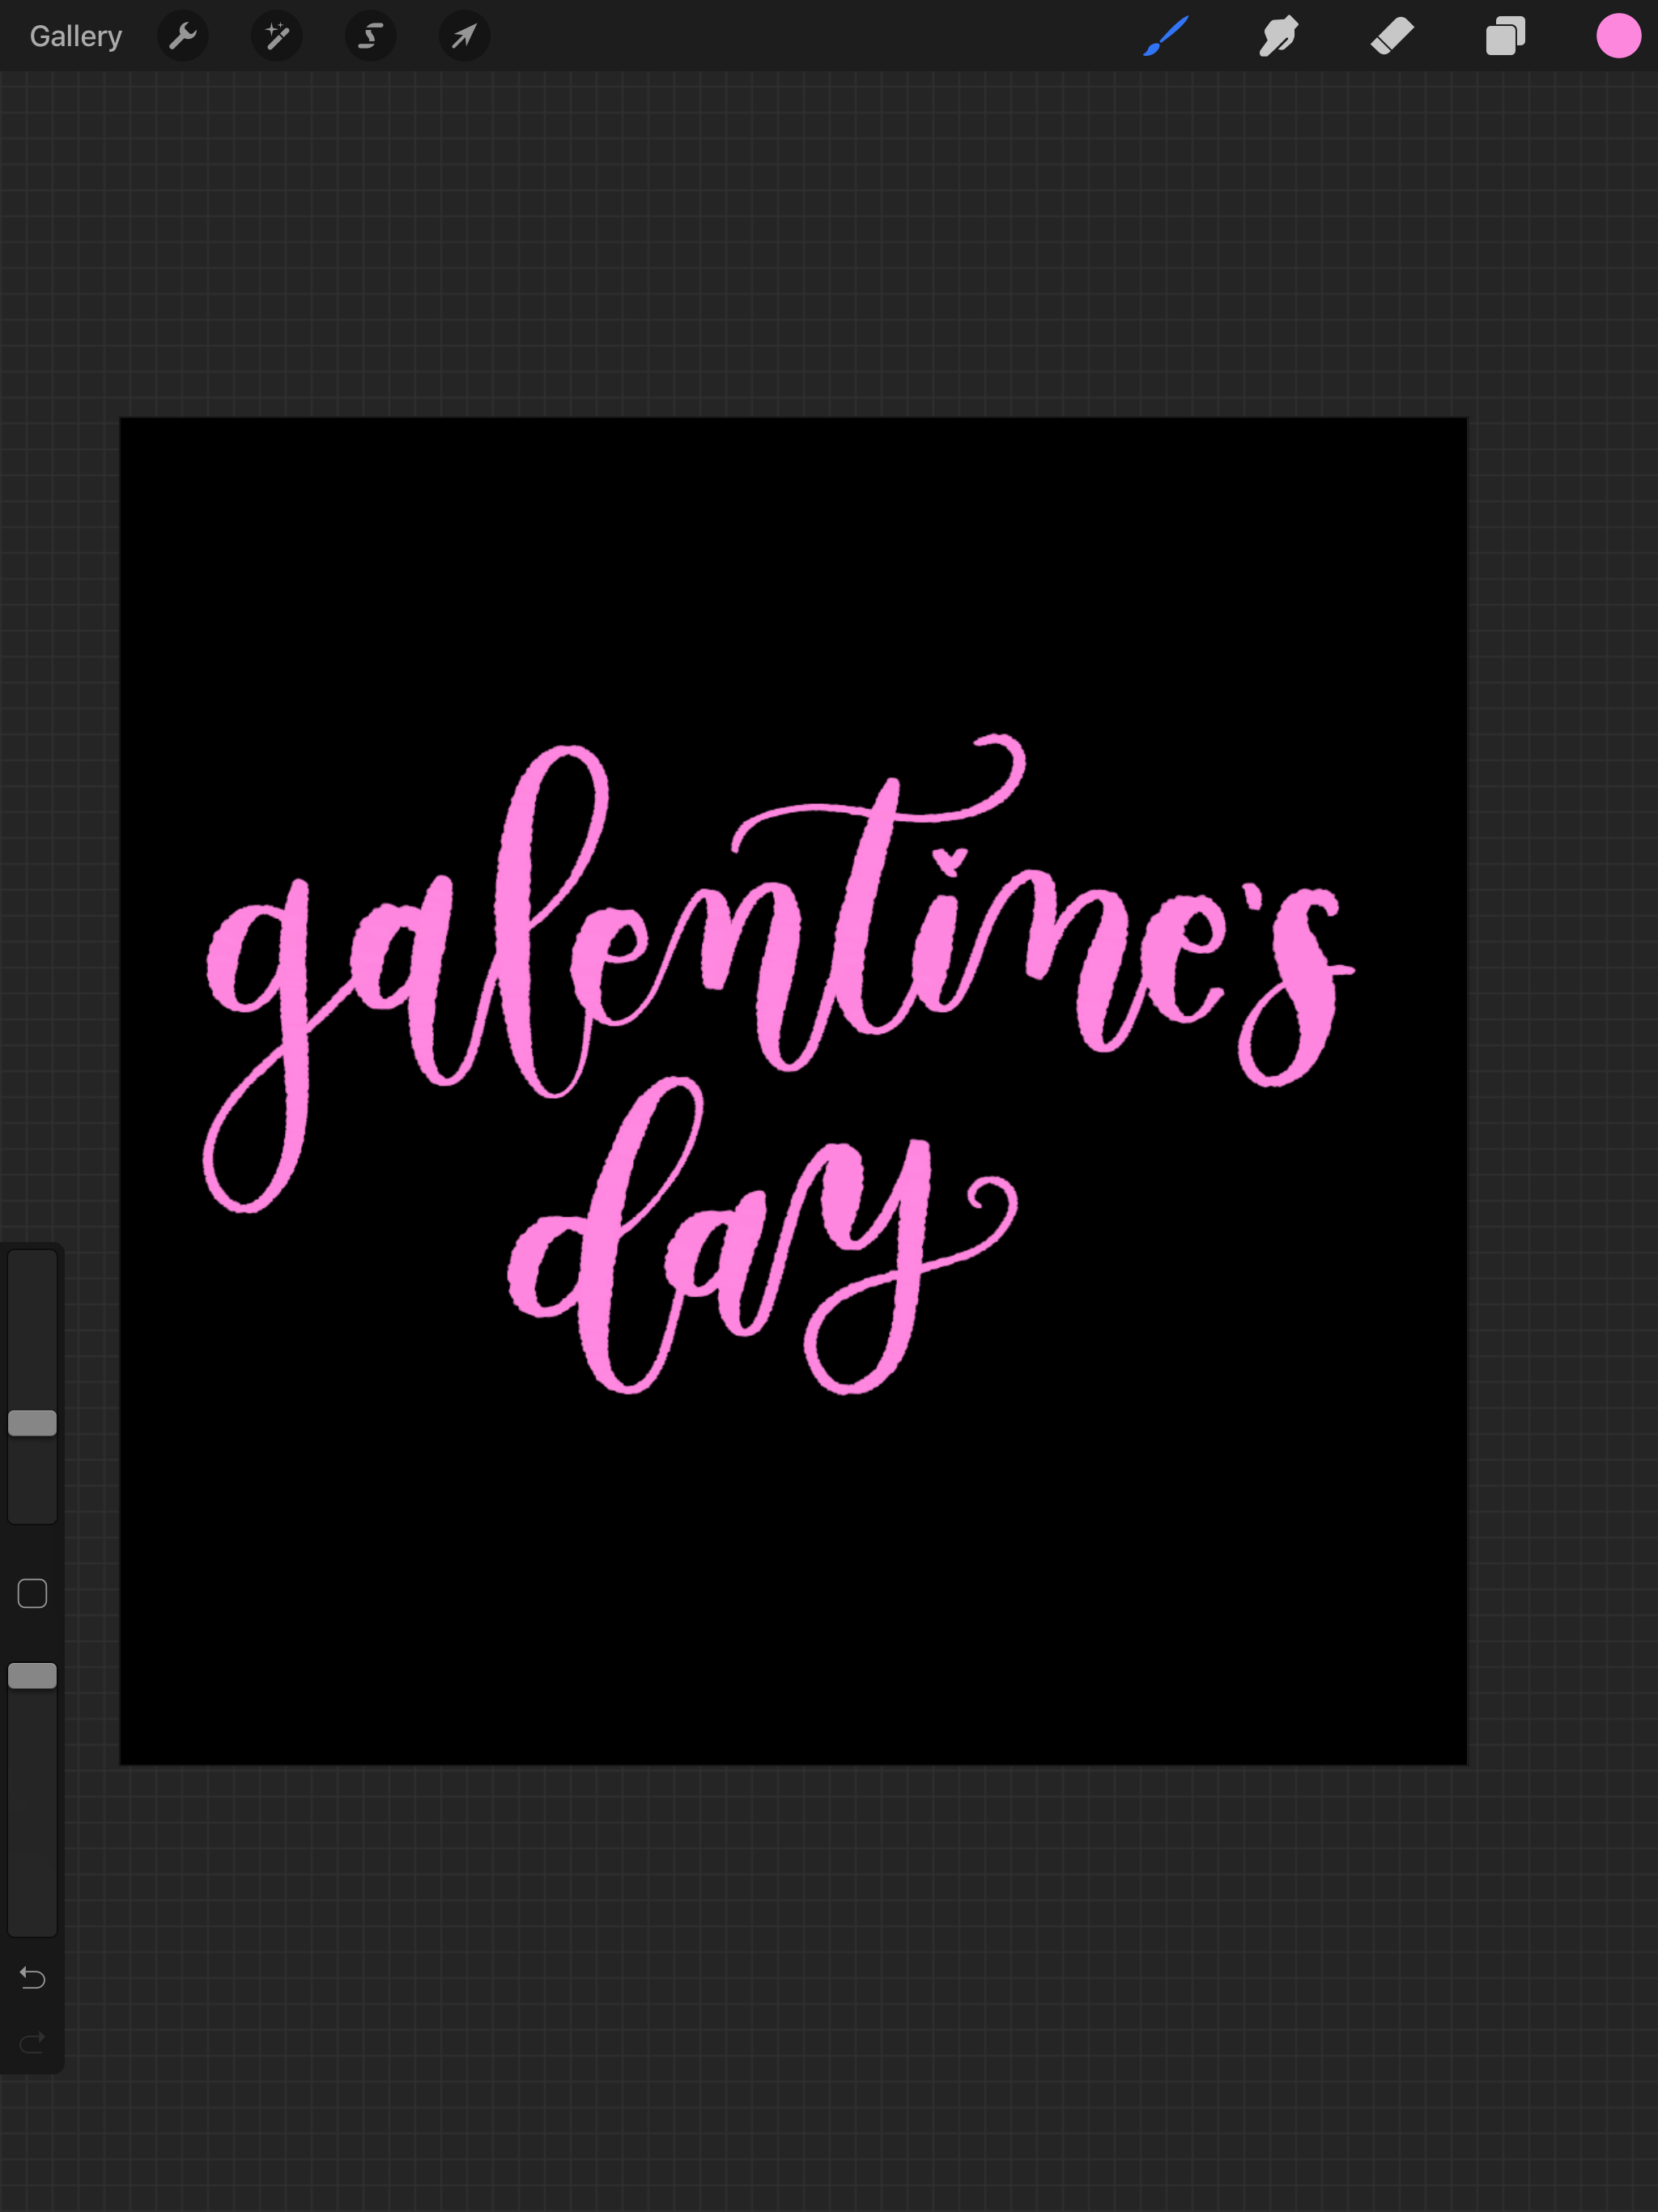
4. Using the first layer write out your phrase or word as you want it. I kept it simple for this one but there are numerous skillshare classes on how to create really unique and advanced types of GIFs on procreate.
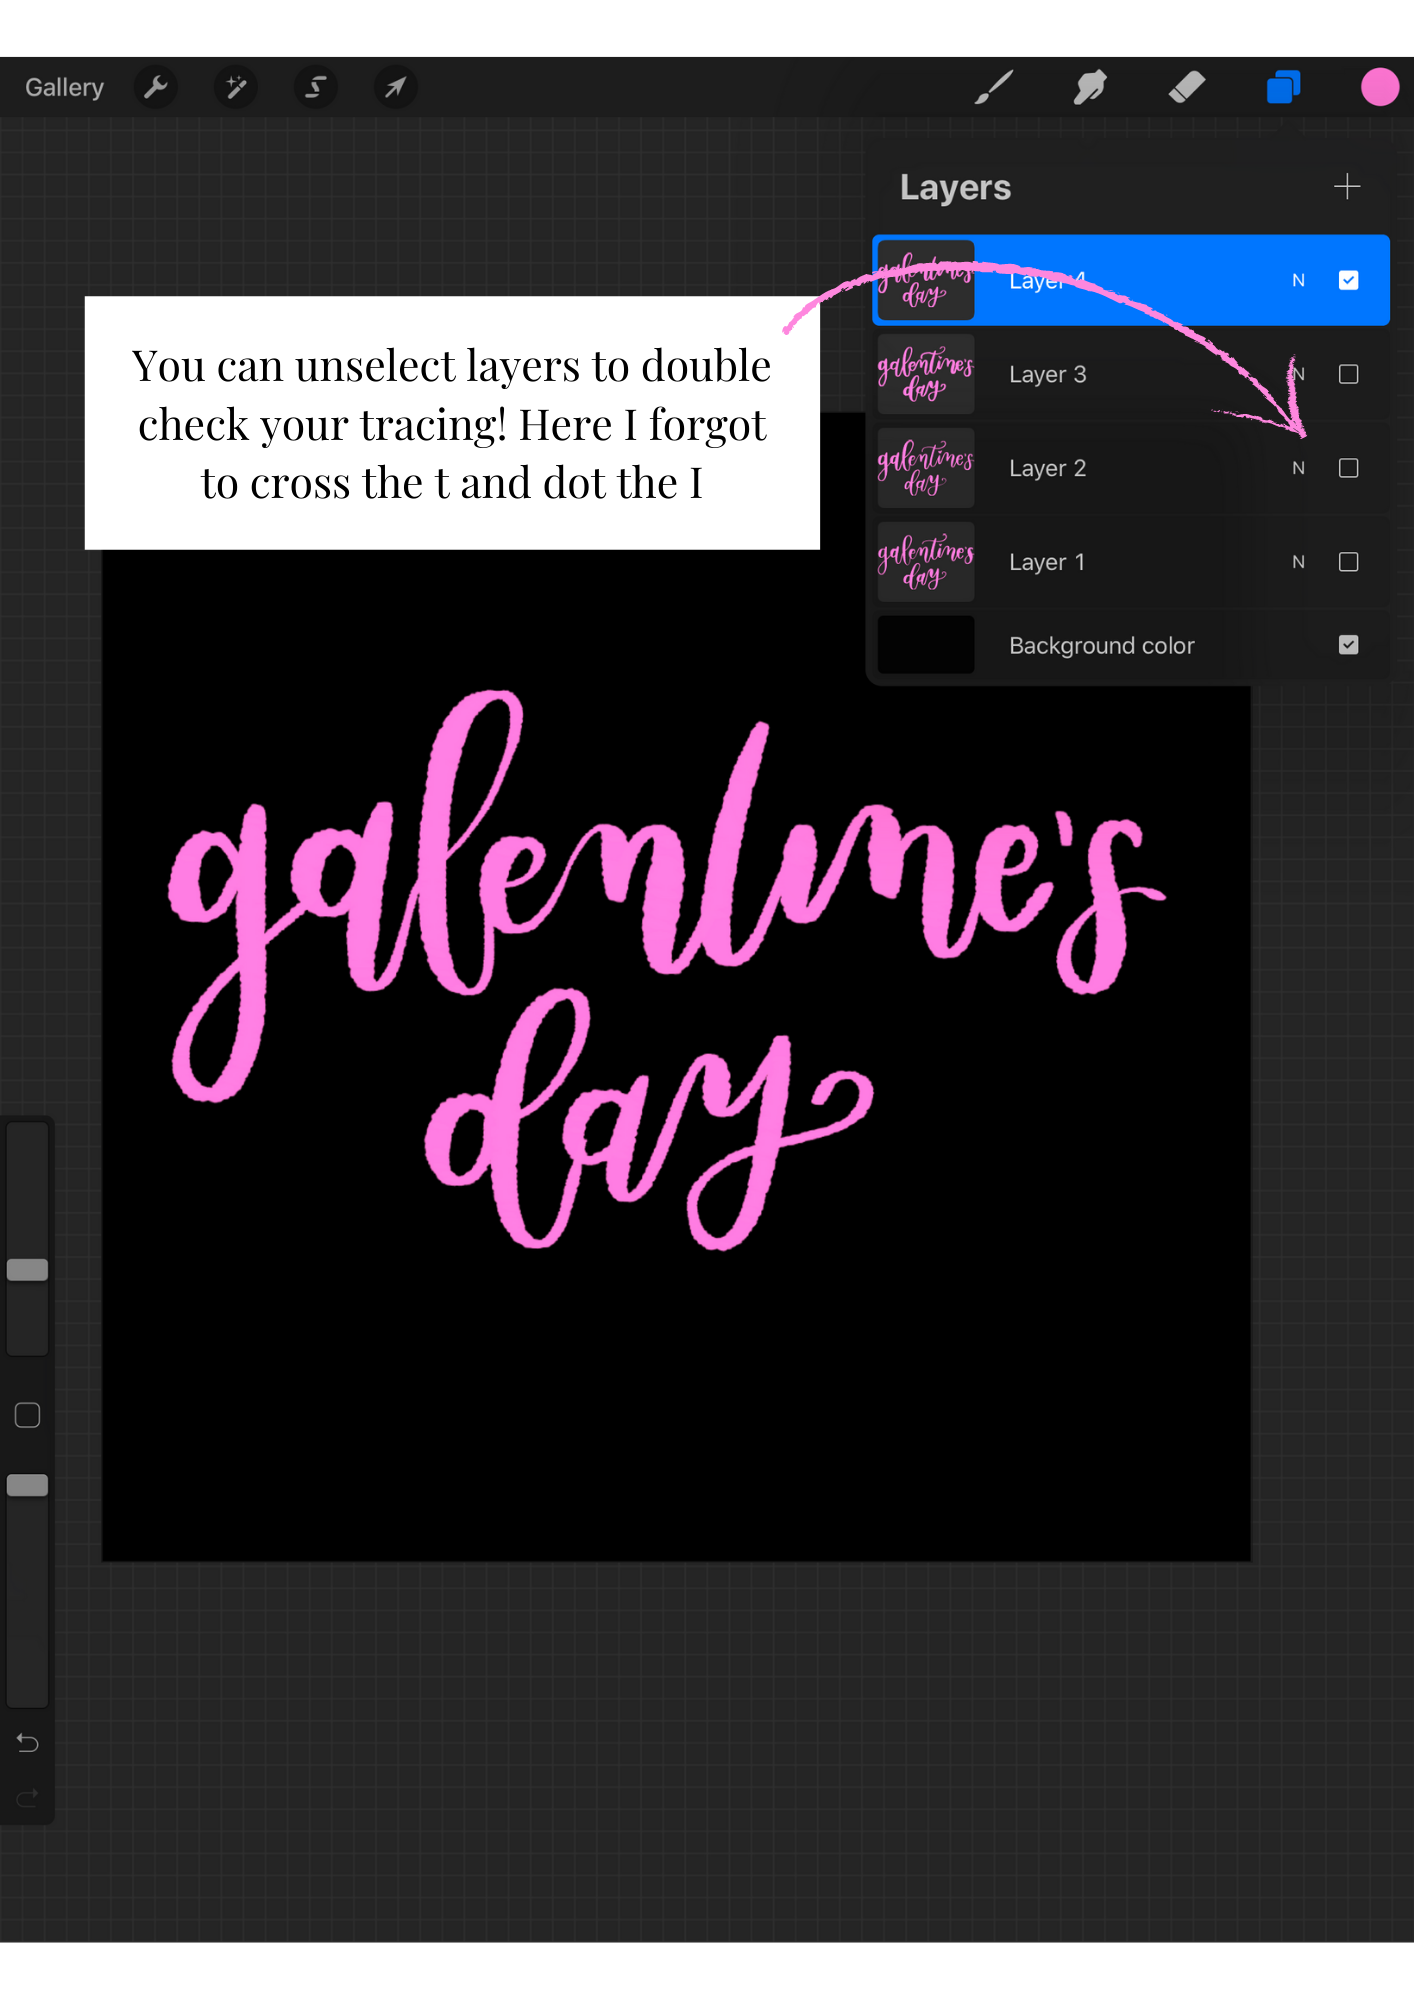
5. Once you’re happy with the look of what you’ve written, add a second layer and trace the first layer by writing out the word again. It doesn’t have to look exact because this is what will make it look like the word is wiggling when it exports.
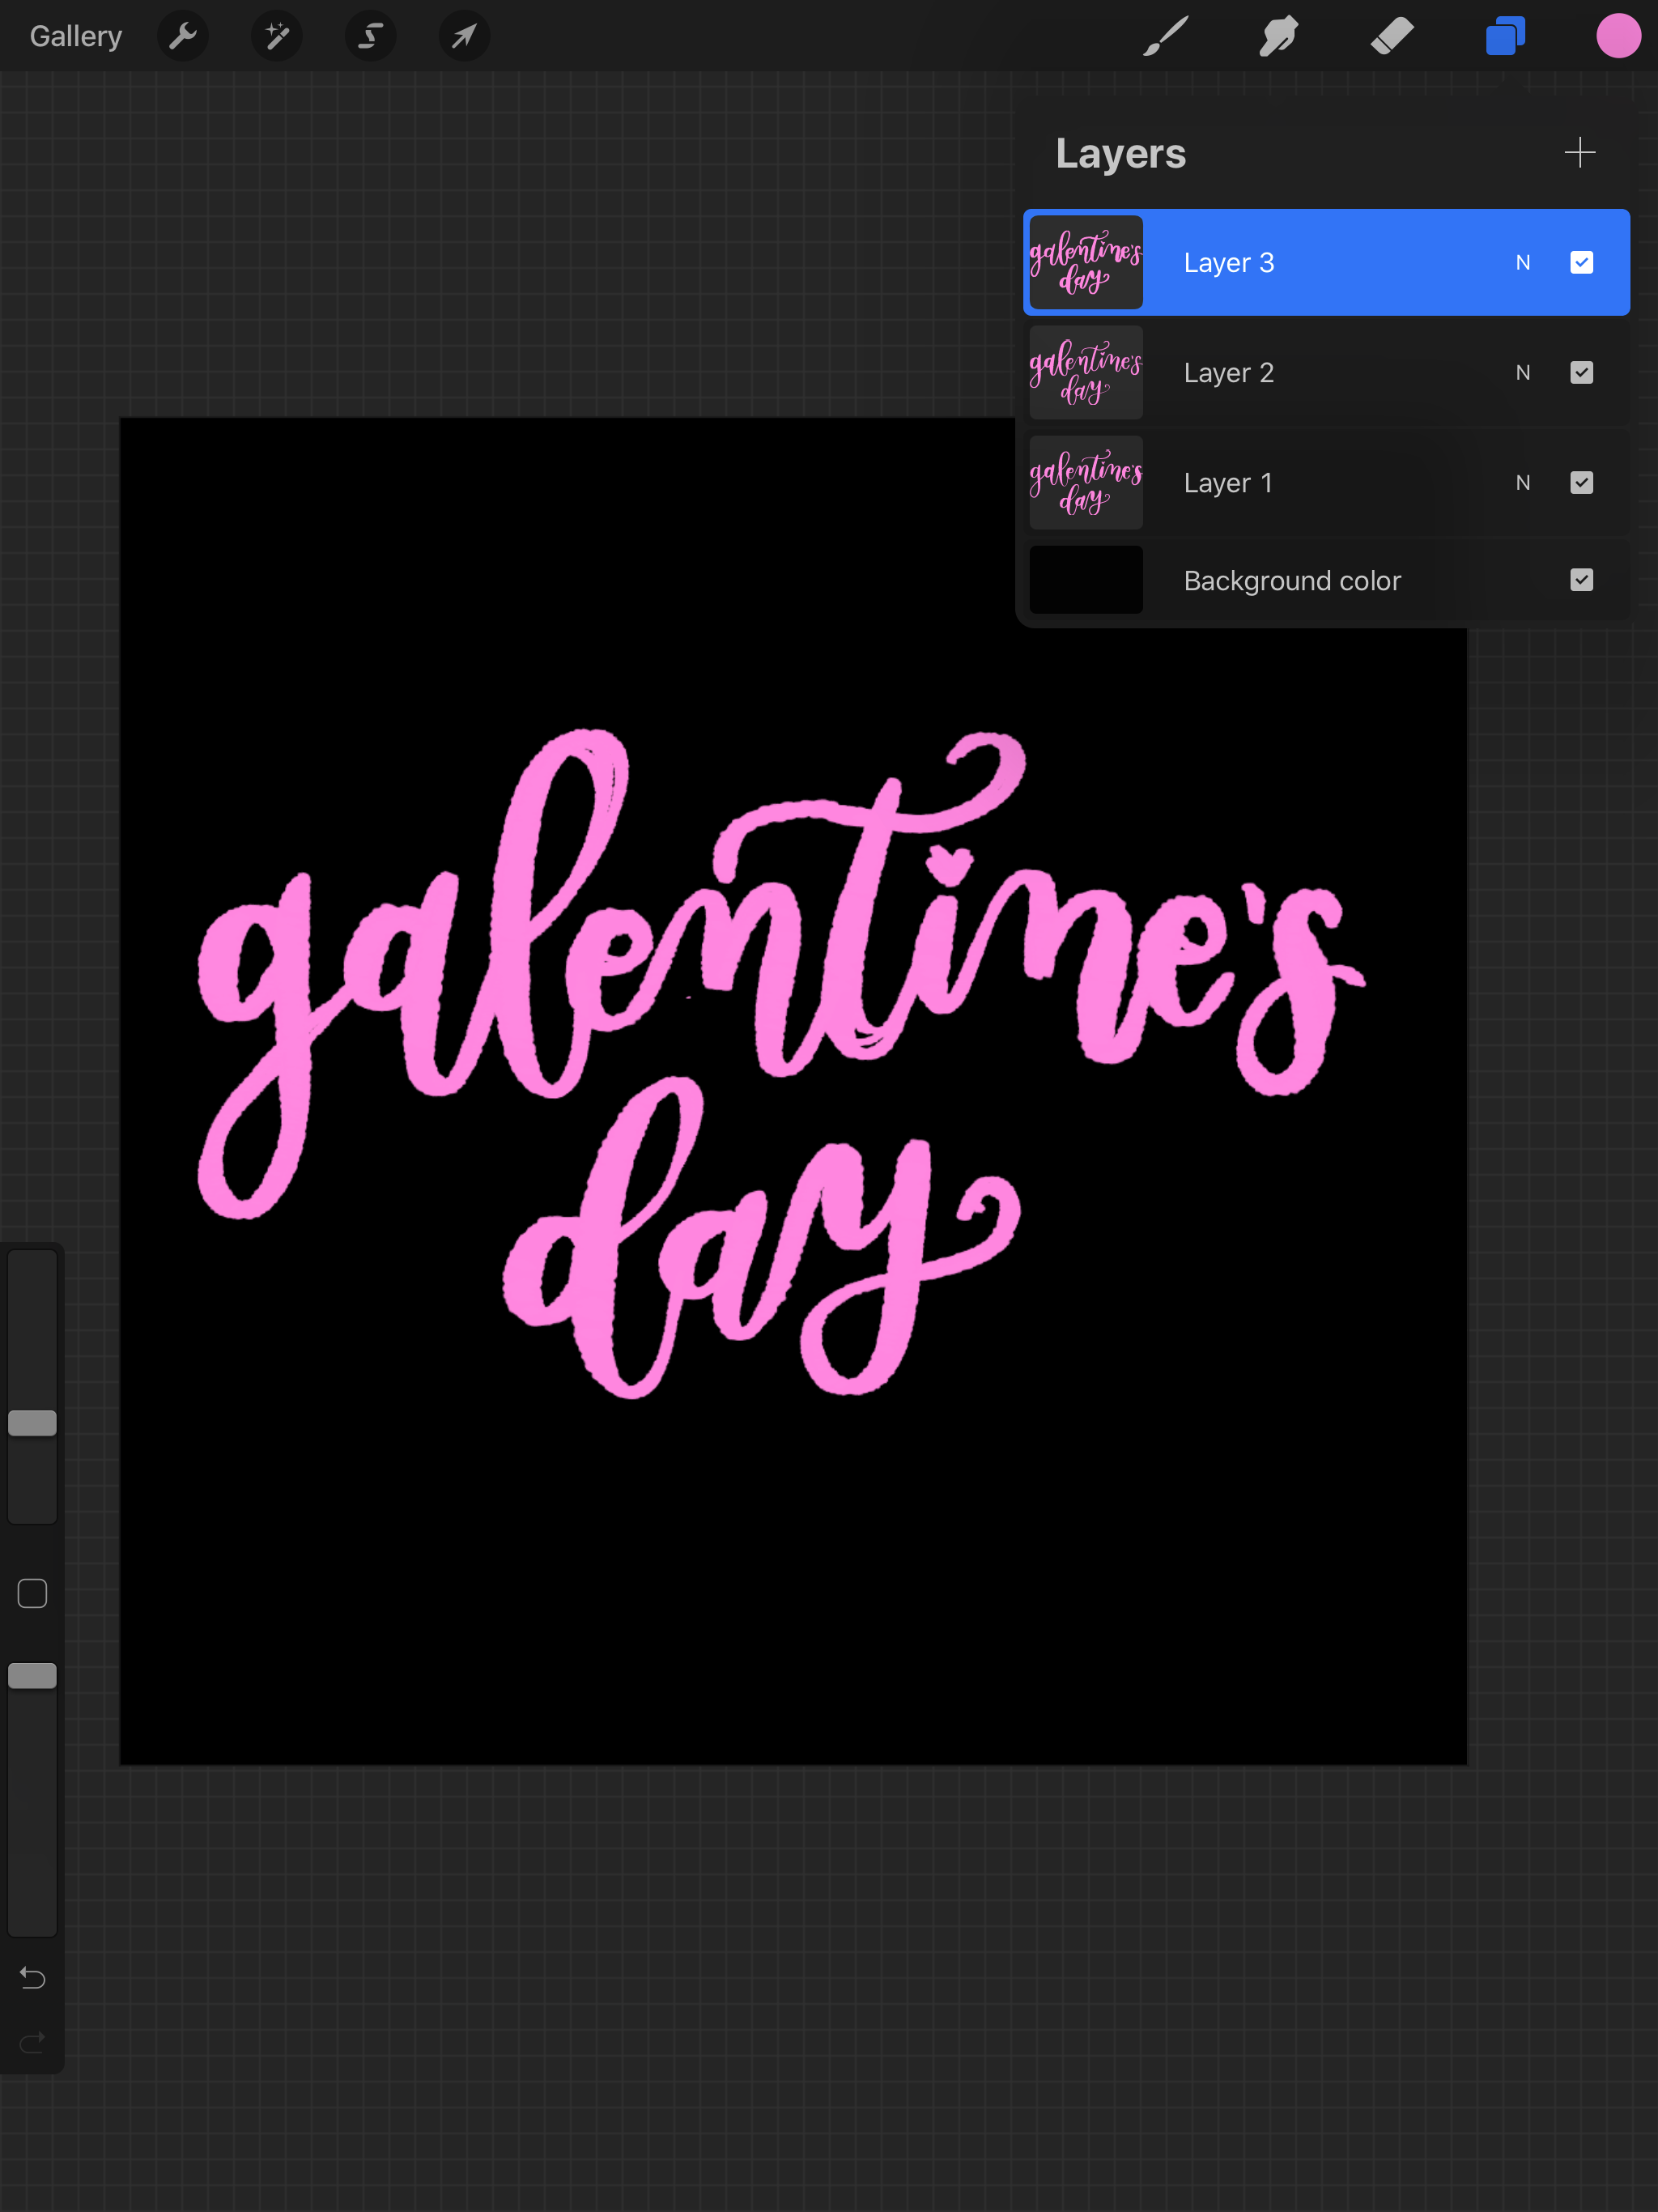
6. Add a third layer and repeat this process for 5 layers at least. You’ll want the GIF to be 3 seconds or longer for it to upload on IG stories. A tip here is to make sure that your strokes are all connected in each layer with no spaces. I sometimes uncheck the previous layers to make sure I wrote everything and didn’t miss dotting an i or crossing a t. If you forget, or if there is a gap anywhere it will become really obvious when you go to export the file! Another hack for this is turning down the opacity on each layer to trace. Do what works for you!
7. When you are finished creating your layers, now is when you’ll want to crop the canvas size down to making it as tight as possible to your lettering. This will help avoid it looking too pixelated once it’s on Snapchat or Instagram.

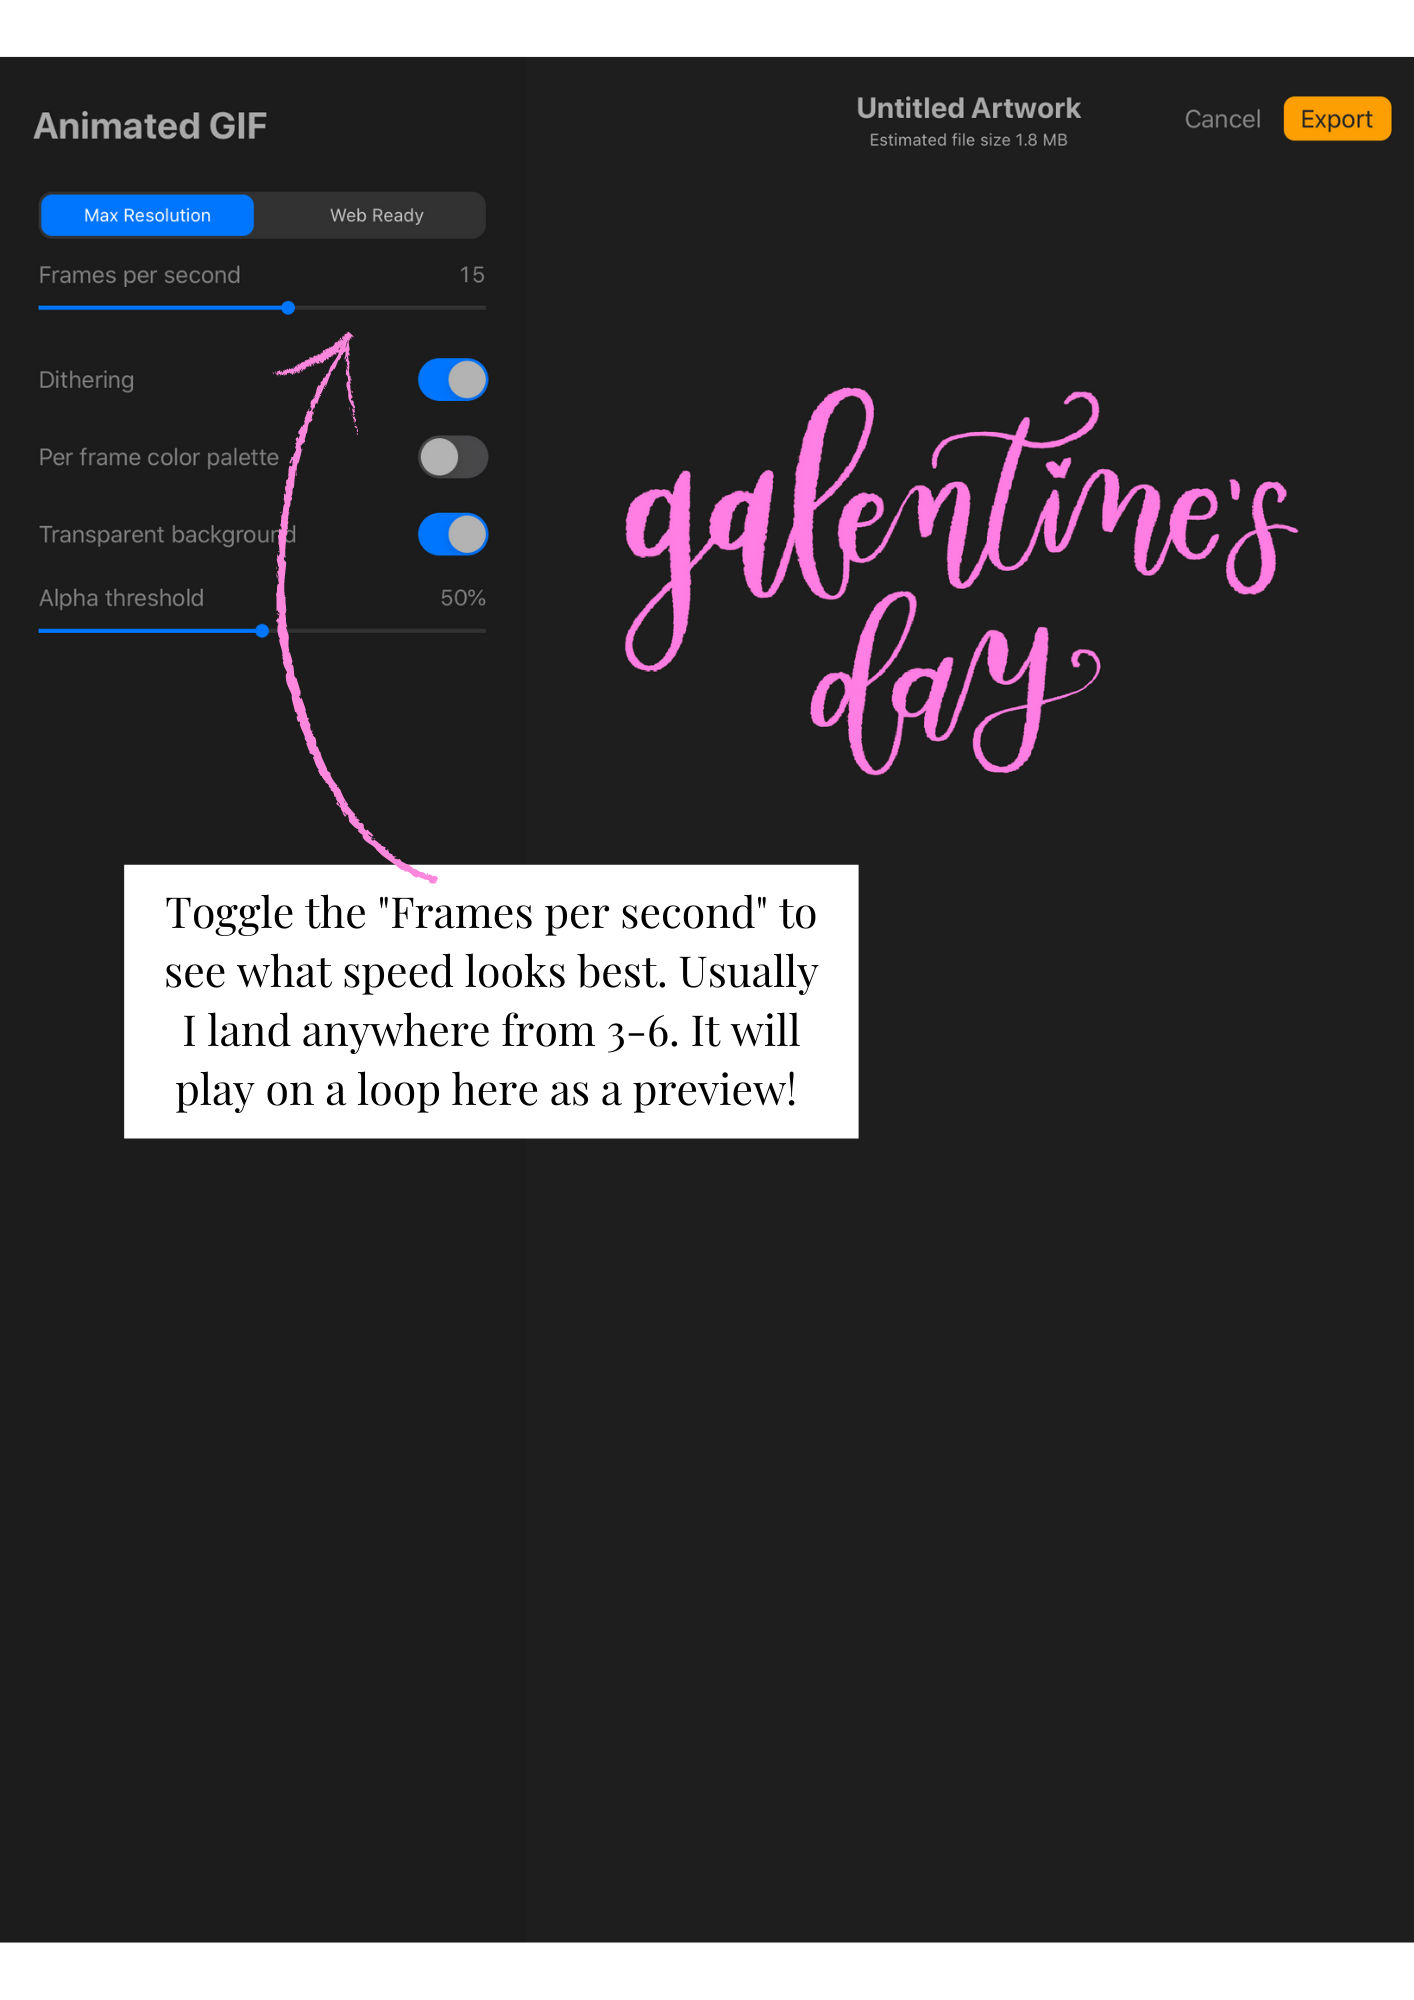
8. Once you’re finished cropping and creating your layers, unselect your background layer so that it’s a transparent file and go to “share” and select “animated gif”. You will be able to preview the gif and if anything looks wonky you can go back and take a peek at your layers to correct it (usually this is a “broken” line aka step 6) and definitely toggle the speed down to what looks good! I usually do 3-6 speed just so that it’s not too fast that it’s hard to look at.
9. I usually export this to save on my desktop and phone. You can then upload your gif to GIPHY and make sure to type in all the keywords that people might search for when looking to use a gif like yours! Also make sure to include your brand as a keyword so it will show up when anyone searches your business name. The first round of 5 in the approval process take the longest to be approved, but then after that it usually just takes a few hours between the time I upload one and then can see it in the gif search on stories.


10. Announce your new gifs on socials and tag us so we can use them too!
If you are a small business owner, did you know you could commission a calligrapher to make your brand gifs?! If you’re interested in this let us know because we have a whole team who would love to create some for you! Meanwhile we’ll keep watch for some fun new gifs we can use in our stories so definitely tag us if you follow these steps and make your own!

No Comments